Creating Blueprints
Blueprints are a collection of resources which can be created with the Shipyard tool. In their simplest form they are nothing more than one or more text files in a folder.
In this tutorial you will learn how to create a Blueprint which will create a Kubernetes cluster, install an application to the cluster, and expose a Kubernetes service to your local machine.
Structure and Dependencies#
The resulting file structure you will create is going to look like this:
--- simple_kubernetes | --- network.hcl | --- k8s.hcl | --- k8s_app | | --- app.yaml | --- README.mdWhen executing the shipyard run command Shipyard parses the current folder for .hcl files containing resources. It works out the dependencies of these resources and creates a graph which controls the order by which resources are created. For example, you are going to create the following resources in this example.
| resource type | file |
|---|---|
network | network.hcl |
k8s_cluster | k8s.hcl |
k8s_ingress | k8s.hcl |
k8s_config | k8s.hcl |
There is an inherent dependency between these resources, for example, you can not create a Kubernetes cluster unless there is a network to attach it to, and you can not apply Kubernetes config to a cluster which does not exist.
Shipyard understands and manages these dependencies for you, for example, given your list of resources, the following graph would be produced by Shipyard.
--- simple_kubernetes | --- network | --- k8s_cluster | --- k8s_config | --- k8s_ingressThe first thing that Shipyard would do is to create a network, it validates that the network has been created successfully before proceeding to the next step.
Next, Shipyard creates the Kubernetes cluster and attaches it to the network, because there are dependencies which rely on the Kubernetes cluser, Shipyard automatically exectues health checks against the cluster to ensure it is ready for work.
Finally, Shipyard applies the Kubernetes config and creates the Kuberentes ingress, both of these steps happen in parallel as they share a common dependency on the cluster.
No matter what the type of resource you create, Shipyard manages the creation order for you.
Destroying resources with shipyard destroy reverses this process. Kubernetes ingresses and configuration are destroyed before clusters and networks. This is to ensure that the cleanup process is successful and no dangling resources are left hanging around.
NOTE: Before continuing, there is on important point. Shipyard DOES NOT recurse into sub folders. If you would like to use sub folders as part of your Blueprint you can use modules to read resources not contained in the current folder.
Creating your first resource#
Create a folder called simple_kubernetes.
Inside that folder create a file called network.hcl, your folder strucutre should look like the following example.
--- simple_kubernetes | --- network.hclInside the network.hcl file let's create a network resource called local which uses a subnet of 10.10.0.0/16.
network "local" { subnet = "10.10.0.0/16"}Shipyard has the capability to incrementally create resources, it understands the difference between the resources defined in your Blueprint and those which have been created. Let's create the network before moving on.
Open a terminal in the simple_kubernetes folder and run the following command:
shipyard runYou should see the following output:
Running configuration from:  ./
2020-08-16T10:58:49.740+0100 [INFO] Creating Network: ref=localTo see the status of currently running Shipyard resources you can use the shipyard status command.
➜ shipyard status
 [ CREATED ] network.local
Pending: 0 Created: 1 Failed: 0Next lets see how you can create the Kubernetes cluster and expose resources in it
Creating a Kubernetes cluster#
The first thing you need to do is to create a Kubernetes cluster, create a new file called k8s.hcl in your simple_kubernetes folder.
Your file structure should now look like:
--- simple_kubernetes | --- network.hcl | --- k8s.hclAdd the following code to the k8s.hcl:
k8s_cluster "k3s" {  driver  = "k3s" # default  version = "v1.17.4-k3s1"
  nodes = 1 # default
network { name = "network.local" }}Note the following network stanza which is a child of the k8s_cluster stanza, the value of the name parameter is set to the same resource name as the network you created earlier. It is this reference which allows Shipyard to calculate the dependency graph.
network { name = "network.local"}Deploying an application to Kubernetes#
Let's now see how you can deploy an application to Kubernetes, first create a new folder inside simple_kubernetes called k8s_app, inside that create a file called app.yaml. Your structure should look like the following example:
--- simple_kubernetes | --- network.hcl | --- k8s.hcl | --- k8s_app | | --- app.yamlInside app.yaml add the following Kubernetes resource:
apiVersion: apps/v1kind: Deploymentmetadata: name: web-deployment labels: app: webspec: replicas: 1 selector: matchLabels: app: web template: metadata: labels: app: web spec: containers: - name: web image: nicholasjackson/fake-service:v0.14.1 ports: - containerPort: 9090 env: - name: "LISTEN_ADDR" value: "0.0.0.0:9090" - name: "NAME" value: "web" - name: "MESSAGE" value: "Hello World"To deploy this application automatically you can use a k8s_config resource. Add the following resource to your k8s.hcl file beneath the k8s_cluster resource. The cluster parameter which references the k8s_cluster resource lets shipyard know of the dependency and create order between the two resources.
k8s_config "app" {  cluster = "k8s_cluster.k3s"
paths = ["./k8s_app/"] wait_until_ready = true}Let's run Shipyard again and create the new resources, from a terminal in the simple_kubernetes folder run the following command.
shipyard runYou should see some output which looks like the following example:
Running configuration from:  ./
2020-08-16T11:21:26.580+0100 [INFO] Creating Cluster: ref=k3s2020-08-16T11:22:08.903+0100 [INFO] Applying Kubernetes configuration: ref=app config=[/home/nicj/go/src/github.com/shipyard-run/shipyard-website/examples/simple_kubernetes/k8s_app]Note that Shipyard only created the k8s_cluster and the k8s_config even though the resources contained in the blueprint also included the network. This is because Shipyard tracks the state of created resources. If you again run the shipyard status command you will see the following output.
➜ shipyard status
 [ CREATED ] network.local [ CREATED ] k8s_cluster.k3s [ CREATED ] k8s_config.app
Pending: 0 Created: 3 Failed: 0When Shipyard created the cluster it outputs the Kubernetes config file used to access the cluster in the following location $HOME/.shipyard/config/k3s/kubeconfig.yaml.
You can use this file with kubectl to query the currently running pods.
KUBECONFIG=$HOME/.shipyard/config/k3s/kubeconfig.yaml kubectl get podsYou should see the following output.
NAME READY STATUS RESTARTS AGEweb-deployment-5fb4db5465-b5tgd 1/1 Running 0 4m41sEven if you did not have kubectl installed Shipyard would still have been apble to create the pod as it does not have any external dependencies other than the Docker Engine.
Let's look at a more userfriendly way of discovering and setting the environment variable for the Kubernetes configuration.
Defining environment variables using Output resources#
Shipyard has the concept of output resources, these variables which can contain information for the users of your blueprints or can be set as environment variables. Let's see how you can create an output variable. In the k8s.hcl file after the k8s_config resource add the following output variable stanza.
output "KUBECONFIG" { value = "${k8s_config("k3s")}"}If you look at the value parameter of this resource you will see it contains a value ${k8s_config("k3s")}, in Shipyard paramters the characters ${ } are used to call a Shipyard function or to reference a variable. In this example you are calling the k8s_config function with a single parameter k3s which is the name of the k8s_cluster resource. At runtime Shipyard will interpret this function and replace it with the location of the Kubernetes config for the k3s cluster.
Let's see how this works, from the simple_kubernetes folder first create the new output resource using the shipyard run command:
➜ shipyard run   Running configuration from:  ./
2020-08-16T11:40:11.739+0100 [INFO] Creating Output: ref=KUBECONFIGOutput variables are just like resources, they need to be created with the run command before they can be used. You can then use the shipyard output command to show the defined output variables in the configuration. This command will output a JSON formatted string containing all the output resources.
➜ shipyard output{ "KUBECONFIG": "/home/nicj/.shipyard/config/k3s/kubeconfig-docker.yaml"}To view a single output you can also use the command shipyard output <name>, for example to see only the value of the KUBECONFIG output you can run the following command.
➜ shipyard output KUBECONFIG/home/nicj/.shipyard/config/k3s/kubeconfig-docker.yamlUsing this approach you could use something like a bash subshell to set an environment variable:
export KUBECONFIG=$(shipyard output KUBECONFIG)Shipyard has a command to save you this work called shipyard env, running this command Shipyard will automatically create an output string in your OS specific format for setting environment variables.
➜ shipyard envexport KUBECONFIG=/home/nicj/.shipyard/config/k3s/kubeconfig-docker.yamlYou could use this like the following example to set all the output variables in your Blueprint as environment variables:
eval $(shipyard env)Let's now see how you can expose this running application to your local machine
Exposing applications running in Kubernetes clusters#
To expose the application you created inside the kubernetes cluster to your local computer you can use a k8s_ingress resource. The k8s_ingress resource will create a proxy which can be used to access an application running in a pod. Add the following resource definition to your k8s.hcl file. The order resources are placed in a file, or in fact which file the resources are placed in does not matter. Shipyard calculates dependency between resources by using parameters like cluster. It does not use file order.
k8s_ingress "app" {  cluster = "k8s_cluster.k3s"
  network {    name = "network.local"  }
  deployment  = "web-deployment"
port { local = 9090 remote = 9090 host = 9090 open_in_browser = "/ui" }}Run Shipyard again to create this ingress:
➜ shipyard runRunning configuration from:  ./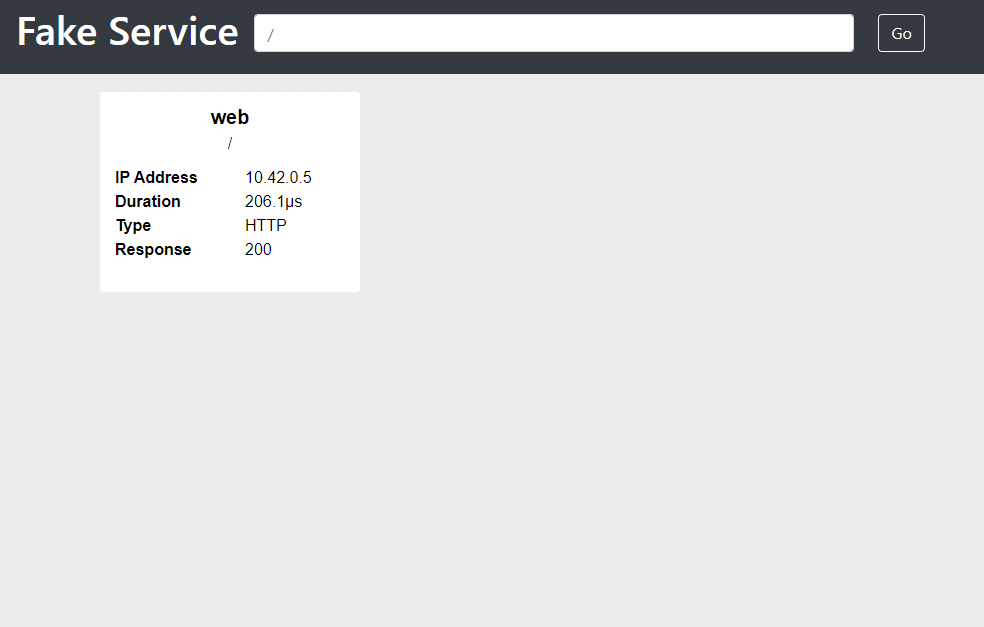
2020-08-16T12:01:48.036+0100 [INFO] Destroy Ingress: ref=app type=ingress2020-08-16T12:01:48.296+0100 [INFO] Creating Ingress: ref=appBecause of the open_in_browser parameter, Shipyard should open a URL in your browser which points at the newly created k8s_ingress.
That is all of the resources created for this simple application, before we finish, let's take a quick look at how you can provide documentation for your Blueprint.
Documenting Blueprints#
To help users consume your blueprints you can create usage documentation which is output to the terminal after the shipyard run command completes you can create a README.md file containing Markdown formatted documentation.
In the simple_kubernetes folder create a file called README.md. Your final folder structure should now look like the following example:
--- simple_kubernetes | --- network.hcl | --- k8s.hcl | --- k8s_app | | --- app.yaml | --- README.mdInside the README.md file add the following Blueprint definition.
---title: Simple Kubernetes Exampleauthor: Nic Jacksonslug: simplekube---
This blueprint creates a simple Kubernetes cluster and install a simple applicationWhen you execute the shipyard run command you will now see the following output:
Running configuration from:  ./

########################################################
Title Simple Kubernetes ExampleAuthor Nic Jackson
This blueprint creates a simple Kubernetes cluster and install a simpleapplication
This blueprint defines 1 output variables.
You can set output variables as environment variables for your current terminal session using the following command:
eval $(shipyard env)
To list output variables use the command:
shipyard outputThat is it for this tutorial, just one final thing, how to destroy resources.
Destroying resources#
To remove and cleanup resources created with the run command you can use the destroy command. Run the following command in your terminal to clean up any resources created by this tutorial.
shipyard destroyYou will see that the order by which resources are destroy is the reverse of the creation order.
2020-08-16T12:59:26.902+0100 [INFO] Destroy Ingress: ref=app type=ingress2020-08-16T12:59:26.902+0100 [INFO] Destroy Kubernetes configuration: ref=app config=[/home/nicj/go/src/github.com/shipyard-run/shipyard-website/examples/simple_kubernetes/k8s_app]2020-08-16T12:59:27.195+0100 [INFO] Destroy Cluster: ref=k3s2020-08-16T12:59:27.623+0100 [INFO] Destroy Network: ref=localYou have now learned all the core concepts of Shipyard and how you can create a simple configuration. The full source for this example can be found at https://github.com/shipyard-run/shipyard-website/tree/main/examples/simple_kubernetes.